In our three gr. 8 classrooms, students have learned the process of 3D printing using dual extrusion (printing with 2 colours) using a Makerbot Replicator 2X. Last year, due to the large number of students we had using the printer, we needed another to keep up, but this time we chose an AirWolf 3D HDR printer for a few reasons: cloud based slicing via Astroprint, larger print size, and the ability to print with a wider range of materials. Added bonus – the tech support help from AirWolf3D is excellent.
While I’ve posted some examples of how our students design and print using dual extrusion with the Makerbot, my teaching partner, Marc Westra, and I quickly learned the process was quite different using an AW3D HDR – like taking the elevator instead of the stairs.
Here’s what I learned over the Christmas break, and what we’ll be teaching our students…
Step 1: When printing in dual colors on the AirWolf 3D HDR, you need to design the part in CAD software that you would like printed in nozzle 1, and save it as an .stl file. Then design the part you would like printed from nozzle 2, and save it as a separate .stl file. Both .stl files must be designed around the same origin point for this to work, so I found it easiest to design all parts together, manipulate/size, then make copies of the original parts stored as a separate file. This is demonstrated step-by-step below.
Aside note: With the Makerbot software, you initially design each part regardless of point of origin, then import each file into the slicing software, Makerware. This is where you can manipulate size, position, and assign .stl files to the extruders around a point of origin.
Back to the AirWolf..
Step 2: Open Cura (slicing software – good intro video here) and bring in the .stl file you want printed from nozzle 1. The first .stl file that is brought into Cura will automatically be designated as printing from nozzle 1. Then bring in the second .stl file, which you would like printed from nozzle 2. Once this is done, right click one of the parts and select “Dual Extrusion Merge”. This will merge the parts together. You can then adjust your settings in Cura, save as a .gcode file, and print the .gcode file.
Step 3: Print
Astroprint does not have a capability of processing dual color prints, so the cloud slicing feature cannot be used for this purpose. Basically for now, you can send your .gcode file to the AW3D HDR via the upload button in the Wolfbox Interface (step-by-step instructions here). The .gcode files will not be stored in your AstroPrint account but they will be stored on the Wolfbox.
You could also connect your printer to a laptop via USB cable and print using RepetierHost.
The benefit of printing via the Wolfbox/Tablet vs. RepetierHost is there’s no need for a laptop, USB cable, and students can send their files to the tablet so prints are queued.
What? Can Gr. 8 students do this? Absolutely.
Below is a simple example of how to print via dual extrusion using the AirWolf 3D HDR. The CAD software used in this example is the Morphi app which we’re switching to since our students now all have ipads. The principles/steps however, apply to any CAD software.
Here’s what I did…
Part A using Morphi app: I first added the green sphere then the red cone. I did not group, or merge. This file was saved in the gallery (as an .stl file).
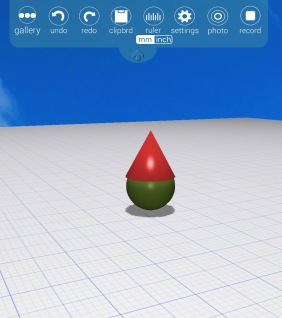
I clicked on one item (e.g. red cone only), selected “clipbrd”, “copy selected”, “gallery”, opened a new build plate (by clicking on the “+” sign in the gallery), selected “clipbrd”, “paste selected”. The red cone appeared alone. This file was then saved in gallery as a new .stl file. Repeat these steps by selecting the green sphere only.
Therefore I have an .stl file with just the sphere and an .stl file with just the cone, but both pieces are in the same position on the grid as per the original design. Students will email each file and use a laptop to download each .stl file.
Part B: Open Cura, and bring in each file separately. I brought the sphere in first, then the cone. Each object sat beside each other (see pic below – I didn’t arrange them like this).
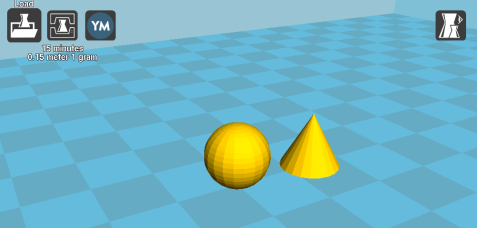
Right click, choose “dual extrusion merge”.
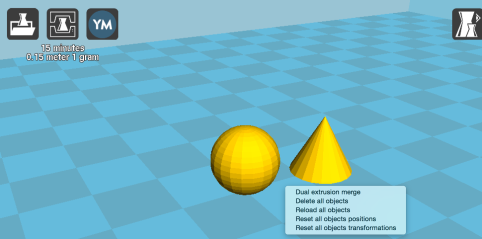
The sphere and cone automatically moved to the same placement as in the original design. Magical.
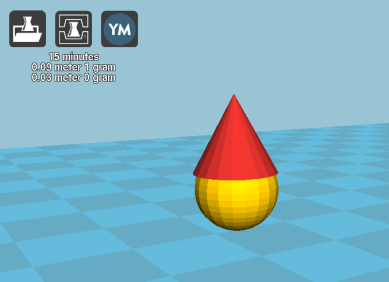
Save as .gcode and print.
Note – whatever .stl file you bring in first will be assigned and printed by the left extruder, the 2nd will be printed by the right extruder. If using more than 2 parts (example below), select all the parts that are to be the same colour.
Example 2 – more complex
In the example below, I added a yellow cylinder. I want the red cone and yellow cylinder to be printed using the same coloured filament.
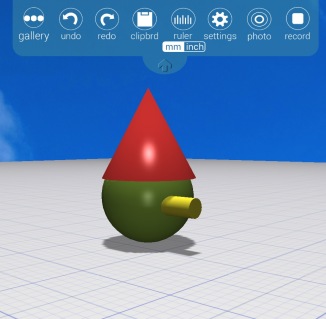
Similar to the first example, I clicked on one item (e.g. red cone only), then the yellow cylinder, selected “clipbrd”, “copy selected”.
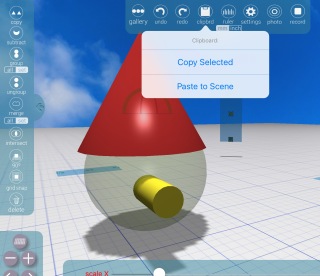
Same as in Example 1, I selected “gallery”, opened a new build plate, selected “clipbrd”, “paste selected”. The red cone and yellow cylinder appeared. This file was then saved in gallery as a new .stl file.
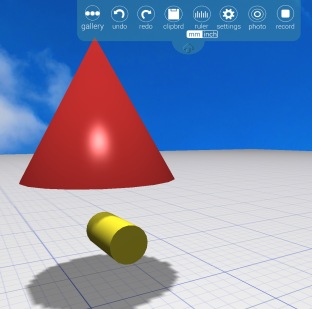
Repeat these steps by selecting the green sphere only, then follow the same steps in Cura (Part B).
Yes, dual extrusion requires a few more steps, but Gr. 8 students are pretty smart cookies and love this stuff!


