Battle Cry for Student Voice: Peer Assessment using @audioboom & QR Codes

Gavin

We all know peer assessment plays an important role in formative assessment. It supports learners as they reflect upon their own work, but also the work of others. Additionally, it can be used as a component in assessment of learning skills. But it can be boring, needing a change.

Today, the risk of using a new tool paid off!

My class recently completed a reading, writing, and oral assignment where they were asked to compare the class read aloud, Half Brother by Canadian author, Kenneth Oppel, to the documentary the novel was based upon, Project Nim. Along the way, scaffolding and feedback were routinely provided. After the writing, students were asked to record a podcast using Audioboom, print off the QR code, and peer assess two other students’ work. It’s the first time I’ve used Audioboom with the QR code requirement. Students need a computer to print off the QR code, and yes, there were a few glitches. We learned students can’t be logged into their account via their ipad and a laptop in order to see if the recording had uploaded.

Once the QR codes were printed, instructions were given on how to peer assess. Download a QR code reader, follow the success criteria, assign a mark.

I’ve used several tools with my students for peer editing before, including google docs. But I found this method to be superior. Why?

1. When students were done peer editing their first assignment, there was no bottleneck. Ready to move on to the next student? They found the QR code of the next assigned student, zapped it, and moved back to their work area to complete.

2. Students weren’t writing over top of each other as experienced when using google docs. That’s frustrating for them.

3. And of course, it was a new tool for them. They were intrigued. We need to change things up every now and then.

While that was impressive, what came next was a win.

Students were told, “Your peer assessments will be returned to you, the owner. Read through it, and at the end, write me a note. Do you agree/disagree with the mark? If so, justify.”

While most agreed, there were several responses that stood out. For example…

Aiden’s editor gave him a 72 because he “lacks expression”, so Aiden responded with “I deserve a 75 because I am sick.”. Yes, he is recovering from a cold, and so he got the 75. Aiden showed initiative and self-regulation by sticking up for himself.

Aiden

Ben received an 85 from his peer editor, but he refused it. “I disagree, because the two “mets” (worth 75%) should bring it (the mark) down more than that.” Ben clearly demonstrated self-regulation (following the rubric/success criteria), and responsibility. And his reflection made me smile the most.

Ben

Peer and self-assessment helps develop a greater sense of responsibility, as students not only honestly reflect on their peers’ work, but also on their own. In terms of summative assessment, I found my students’ ratings of their peers to be honest and kind.

At the end of the exercise, one of the students asked if I was going to be marking the assignments as well. After confirming I would, he responded with, “I wish we could do this all the time.” The battle cry for “student voice”.


Dual Extrusion 3D Design with the @MorphiApp & @AirWolf3D HDR

Dual Extrusion 3D Design with the @MorphiApp & @AirWolf3D HDR

In our three gr. 8 classrooms, students have learned the process of 3D printing using dual extrusion (printing with 2 colours) using a Makerbot Replicator 2X. Last year, due to the large number of students we had using the printer, we needed another to keep up, but this time we chose an AirWolf 3D HDR printer for a few reasons: cloud based slicing via Astroprint, larger print size, and the ability to print with a wider range of materials. Added bonus – the tech support help from AirWolf3D is excellent.

While I’ve posted some examples of how our students design and print using dual extrusion with the Makerbot, my teaching partner, Marc Westra, and I quickly learned the process was quite different using an AW3D HDR – like taking the elevator instead of the stairs.

Here’s what I learned over the Christmas break, and what we’ll be teaching our students…

Step 1: When printing in dual colors on the AirWolf 3D HDR, you need to design the part in CAD software that you would like printed in nozzle 1, and save it as an .stl file. Then design the part you would like printed from nozzle 2, and save it as a separate .stl file. Both .stl files must be designed around the same origin point for this to work, so I found it easiest to design all parts together, manipulate/size, then make copies of the original parts stored as a separate file. This is demonstrated step-by-step below.

Aside note: With the Makerbot software, you initially design each part regardless of point of origin, then import each file into the slicing software, Makerware. This is where you can manipulate size, position, and assign .stl files to the extruders around a point of origin.

Back to the AirWolf..

Step 2: Open Cura (slicing software – good intro video here) and bring in the .stl file you want printed from nozzle 1. The first .stl file that is brought into Cura will automatically be designated as printing from nozzle 1. Then bring in the second .stl file, which you would like printed from nozzle 2. Once this is done, right click one of the parts and select “Dual Extrusion Merge”. This will merge the parts together. You can then adjust your settings in Cura, save as a .gcode file, and print the .gcode file.

Step 3: Print

Astroprint does not have a capability of processing dual color prints, so the cloud slicing feature cannot be used for this purpose. Basically for now, you can send your .gcode file to the AW3D HDR via the upload button in the Wolfbox Interface (step-by-step instructions here). The .gcode files will not be stored in your AstroPrint account but they will be stored on the Wolfbox.

You could also connect your printer to a laptop via USB cable and print using RepetierHost. 

The benefit of printing via the Wolfbox/Tablet vs. RepetierHost is there’s no need for a laptop, USB cable, and students can send their files to the tablet so prints are queued.

What? Can Gr. 8 students do this? Absolutely.

Below is a simple example of how to print via dual extrusion using the AirWolf 3D HDR. The CAD software used in this example is the Morphi app which we’re switching to since our students now all have ipads. The principles/steps however, apply to any CAD software.

Here’s what I did…

Part A using Morphi app: I first added the green sphere then the red cone. I did not group, or merge. This file was saved in the gallery (as an .stl file).

sphere and cone

I clicked on one item (e.g. red cone only), selected  “clipbrd”, “copy selected”, “gallery”, opened a new build plate (by clicking on the “+” sign in the gallery), selected “clipbrd”, “paste selected”. The red cone appeared alone. This file was then saved in gallery as a new .stl file. Repeat these steps by selecting the green sphere only.

Therefore I have an .stl file with just the sphere and an .stl file with just the cone, but both pieces are in the same position on the grid as per the original design. Students will email each file and use a laptop to download each .stl file.

Part B: Open Cura, and bring in each file separately.  I brought the sphere in first, then the cone. Each object  sat beside each other (see pic below – I didn’t arrange them like this).

Screen Shot 2016-01-02 at 3.51.08 PM

Right click, choose “dual extrusion merge”.

Screen Shot 2016-01-02 at 3.51.24 PM

The sphere and cone automatically moved to the same placement as in the original design. Magical.

Screen Shot 2016-01-02 at 3.51.54 PM

Save as .gcode and print.

Note – whatever .stl file you bring in first will be assigned and printed by the left extruder, the 2nd will be printed by the right extruder. If using more than 2 parts (example below), select all the parts that are to be the same colour.

Example 2 – more complex

In the example below, I added a yellow cylinder. I want the red cone and yellow cylinder to be printed using the same coloured filament.

FullSizeRender 3

Similar to the first example, I clicked on one item (e.g. red cone only), then the yellow cylinder, selected  “clipbrd”, “copy selected”.

FullSizeRender

Same as in Example 1, I selected “gallery”, opened a new build plate, selected “clipbrd”, “paste selected”. The red cone and yellow cylinder appeared. This file was then saved in gallery as a new .stl file.

FullSizeRender 2

Repeat these steps by selecting the green sphere only, then follow the same steps in Cura (Part B).


Yes, dual extrusion requires a few more steps, but Gr. 8 students are pretty smart cookies and love this stuff!

Designing & #3DPrinting Cell Models in the Gr. 8 Science Classroom

As part of the Gr. 8 Cells Science Unit, students usually produce a cell model. This year, students learned how to design and create their cell models using our 3D printer with dual extruders. I started the process by teaching students how to dual extrude by creating a simple cell base and adding a nucleus. Each structure was assigned one of the colours in each extruder. Because some of the organelles or structures are difficult to produce using the 3D design software (e.g. mitochondrion, dendrite), students then learned how to bring their 2D drawing of a cell structure into the software (we use Autodesk’s 123D Design). Their drawn structures were then combined with some of the simpler shapes (e.g. nucleus) which they had previously designed using the software. Below are some of the final cell models and the lesson I used to model the process. As a next step, students will be using these skills in geography to create 3D printed terrain maps.

Creating a 3D neuron: Dendrites are detailed and difficult, so the girls added 2 drawings to their axon, which was designed using the software.

Drawing beginning of a neuron

Koby and Lexi with computer

Neuron on the printer

Neuron in front of computer

Screen Shot 2015-01-04 at 8.37.21 AM

Throughout the research and design process, it was evident that students were developing a deeper understanding of their cell and how it related to their chosen topic as they asked questions and revised their project notes. The final step was a class presentation (which included the function of the cell in body systems and their design process).

Trent designing

Jess H and Kirsten

Screen Shot 2015-01-04 at 8.39.42 AM

Screen Shot 2015-01-04 at 8.39.16 AM

Screen Shot 2015-01-04 at 9.32.41 AM

Lesson: Turning 2D Drawings into 3D Designs Using Dual Extrusion

Thanks to @LisaJDempster for sharing her steps for single extrusion and Ainslie Martin for the drawings.

Part A: 2D to 3D

1. Imagine the final design. Then deconstruct the design into layers. This example shows 3 layers (students used 2 layers in the cell project). The image needs to be solid fill with black marker on white paper.

Screen Shot 2015-01-04 at 10.25.09 AM

2. Convert .jpeg to .svg. Take a picture of each layer (jpg on iphone), save and upload to Online SVG image converter.  Settings: I chose monochrome and sharpen.

Screen Shot 2015-01-04 at 10.30.33 AM

3. Click “convert file”, save as a download or to your Drive. Repeat for the next layers.

4. Open your design software (Auto123D Design).  In the left side (look for the drop down arrow), import SVG as a solid (and scale down) or as a sketch (and extrude). I found it easier to do as a solid, highlight one piece, scale it down to 0.25. Click the remaining pieces and they will do the same. Some students preferred the “sketch” route.

Screen Shot 2015-01-04 at 10.33.40 AM

  Top Layer: Eyes, Freckles, Moustache   

  1. Export as .stl (left side drop down arrow). If asked to “Combine all objects?” – Yes.

Part B: Dual Extrusion

  1. Open Makerware (if using a Makerbot dual extruder), Add file (bottom layer). Scale to size – I chose 50%.
  2. Uncheck the “uniform scale” box. Resize the height by moving the Z axis down (print time becomes longer with increased mm).
  3. Add the middle, then the top layer.
  4. Final step – choose the dual extrusion by choosing Object (bottom left icon). Make the bottom and top layer the same colour, middle the alternative. And print!

Face

final med

The Student-Created anchor chart posted in the classroom:

Things to Remember:

  • Drawings must be solid black on white paper
  • Make sure your picture is just of your drawing (no other markings, desk showing)
  • Email drawings as small (not original size)
  • Import svg as a solid (not sketch) in 123D Design
  • Don’t resize in 123D because it freezes, do it in Makerware
  • Don’t forget in 123D to export as stl

Below, Peter and Ryan experiment, using their phones (or mine) to take pictures of their simple designs, which they convert to 3D. This “play time” is an important step before moving into creating a replica of a 3D cell model. Over 70 students with various learning needs from three typical grade 8 classrooms, completed this project either alone or with a partner of their choice.

Peter med

Cell models, terrain maps, art…. I’m eager to hear other directions you envision this design process being used for in the classroom. Please leave an idea or suggestion.

Postscript: The mother of one of my student’s pulled me aside just before Christmas break, saying she had to thank me for something. She then told me that her son asked for a 3D printer for Christmas (and there are low cost ones out there for this purpose). I didn’t previously consider this student as tech-savy, so my grin was probably bigger than it would have been otherwise:)


Providing New Opportunities for Student Success in the Gr. 8 Classroom

After reading Doug Peterson’s post this morning, which promotes the merits of teaching coding in elementary grades, I was reminded of a powerful interview with Silvia Martinez and Gary Stager, authors of Invent to Learn. Similar to Doug’s message, they speak on the importance of introducing students to learning opportunities that might not presently appear as a discipline in the curriculum.

Gary states that one of the 3 keys roles in education is to “introduce kids to things and ideas that they didn’t know they love yet, to give them exposure to things that they could fall in love with, that they could become great at, that they could use as a source of pleasure and opportunity as they go forth in their lives.”

This is our third year as a 7-12 school, and we continue to look for ways to do this in our elementary/high school community. Last year, as part of the gr. 8 science curriculum, our students spent 3 days in the high school wood shop with the tech teachers during a period that hadn’t been filled due to low enrollment. The high school teachers are happy to facilitate our students as they view it as “good advertising” for their program. This year, the high school tech department has a full gr. 9 tech rotation – in fact all periods are full each semester with various tech classes. We’ll still bring the gr. 8’s into the wood shop this year, but it has to be scheduled during the week of high school exams when the wood shop is empty. A good problem to have to work around.

On the other hand, enrollment was too low for the high school design tech class this year, so it was cancelled. But at the opposite end of the school building, our gr. 8’s are now using CAD (computer-aided design) and 3D printing technology. We’ve invited the high school design teacher into our classroom to see the engagement and interest that is emerging in the building. What impact might this have on his design class enrollment in the next few years?

“Proud of my work”. Prototype moves to Autocad 123D Design

By the time students reach high school, the opportunities to expose kids to “things they could fall in love with” is limited due to pathway expectations and required credits. If a student has never been in a wood shop, experienced CAD design and its opportunities, would they sign up for those classes? The same applies to computer science and coding – if a student has never experienced coding, and their passion is undiscovered, it makes sense to suggest it’s less likely they’ll register for it in high school. It’s essential our students are introduced to these opportunities before they decide on a particular career path. Leaving these opportunities until high school is too late. We have “closed the barn door after the horse has bolted”.

Barn door

Photo Credit: EJP Photo via Compfight cc
 

While I have no experience in coding, I’ve been thinking over the past few years about introducing it to our gr. 8’s using Scratch. Yesterday, during a snow day, I was sharing examples of programs students produced using Scratch with our French teacher – programs written by gr. 7 students. We soon began to answer our own questions regarding the why, how and where it could be used across the gr. 8 curriculum. And similar to what I knew about 3D printers when the one I ordered arrived at our classroom door (very little), my knowledge on Scratch is Limited. But as Silvia comments in the video, “Don’t wait for the pre-packaged curriculum. Be the architect of change in the classroom. How to start? Just start.” Once we get started, similar to our learning in 3D printing, I’ll be happy to take a seat beside my students as we learn together.

Today in our gr. 8 classroom, Jerry, a shy, unassuming student, was happy to take on the

“Relinquishing (our) authoritarian role”: Jerry, (gr. 8) teaches 123D Design.

Towards the end of the interview (9:25 to be exact), Gary states that “education needs to redefine success and scale”. He shares his personal experience of learning to program. Twelve-year-old Gary felt “powerful, sophisticated, smart, creative for the first time in my life”, and “developed habits of mind –  the ability to put myself in different perspectives to solve problems that serves me everyday of my life.” The WHY.

Gary acknowledges there might be those in the future who comment, “Remember that time we made things with computers? It didn’t raise test scores…..” His response refers back to the need to redefine student success and scale. “But if we wake up every morning, and we ask ourselves, how do we make this the best 7 hours of a kid’s life? And we now have wondrous materials to make this closer to being a reality…then we haven’t failed in our efforts. We are succeeding all the time.”

Learn more about Gary and Silvia’s work at Constructing Modern Knowledge.

Gift of a Snow Day

While today was a snow day for our students (2nd one this week), it provided an opportunity to spend some time with a student I’ve been thinking a lot about lately.

This gr. 8 student arrived at school today – unwillingly I imagine. She quietly fired up a laptop, and sat working while my teaching partner, Marc Westra, and I chatted away, occasionally bringing her into the discussion about future learning activities. When she asked for help on her 3D design, part of the City X Project, Marc and I were there to guide her through it. Despite her resignation that, “I suck at computers”, she finished the task with soaring success – a dual extruded design.

The Artist’s Design in Makerware

This student is a gifted artist. While we were waiting for her design to print, I shared Lisa Dempster’s resource with her on how to transform 2D art into 3D. I’d just discovered it last night on Twitter – thank-you Lisa! Our student asked detailed questions about the process and offered creative ideas on how to bring her own beautiful animal sketches to life in 3D. Problem solving, creativity, communication. She was engaged; we were connected.  She left for home, excited to prepare and collect her work to bring in for 3D printing tomorrow. This is a student hoping tomorrow, a Friday, is not a snow day. Me too.

The artists watching her work come to life.

Final product

Would this learning have happened on a regular day with a school full of students and social distractions? Maybe, but not as deeply. I see today’s snow day as a gift.

#Bit14 Presentation: 3D Printing – New Dimensions in Student Learning

Heather Durnin and Marc Westra

Why 3D Printing?

Innovation usually starts with a problem, and on the family farm, equipment repairs are a daily and expensive occurrence. Last fall, Farm Industry News published an article entitled, Impact on Agriculture, detailing how 3D printers can quickly and cost effectively print needed combine parts including augers and corn snouts. 3D printers are now used to manufacture prosthetics. Last month, engineering students from the University of Toronto designed and built a 3D printer that produces skin grafts using the patients own cells. 3D printing is changing industry and business as it transforms the areas of repair, prototyping, and niche item production. With the price of a printer becoming more affordable, it is now possible to introduce this technology to our students.

How It Works

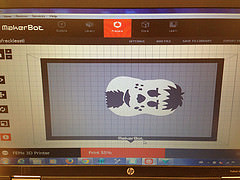
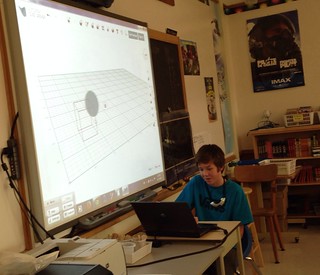
3D printing provide students with a new type of manipulative for use in almost any class; one that allows them to move between the abstract and concrete by designing and creating. Printers can now be purchased for anywhere between $500 – $2500, and the options continue to expand as more companies move into the business. We have a Makerbot Replicator 2X which was purchased through Sculpture Supply in Toronto.

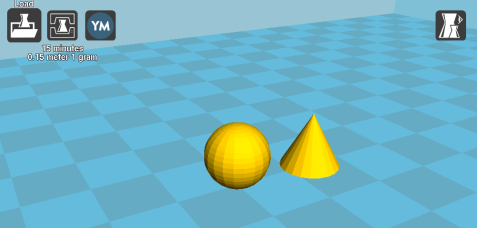
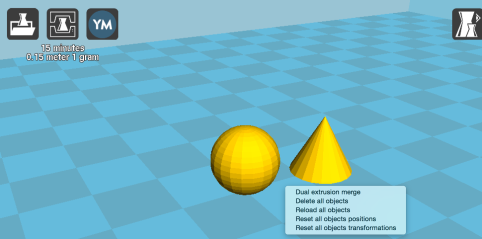
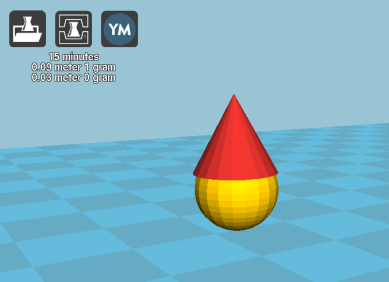
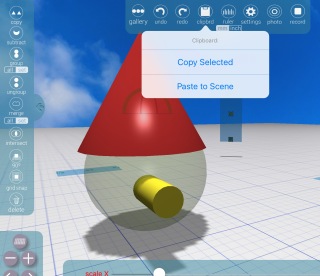
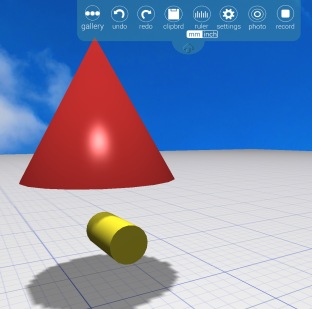
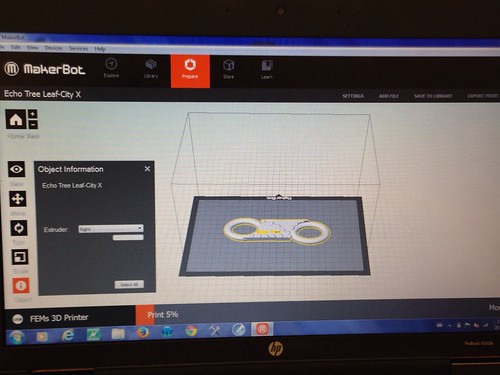
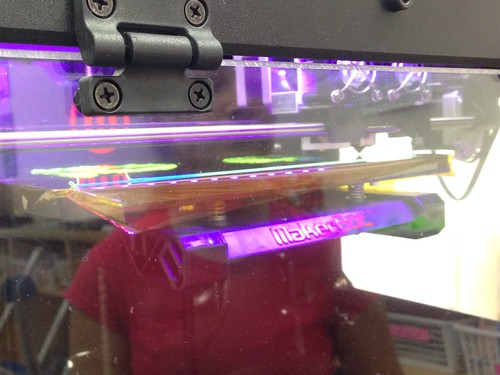
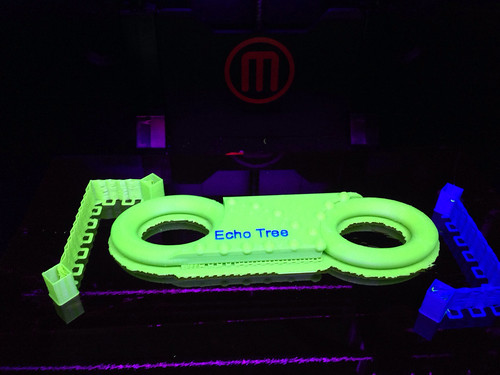
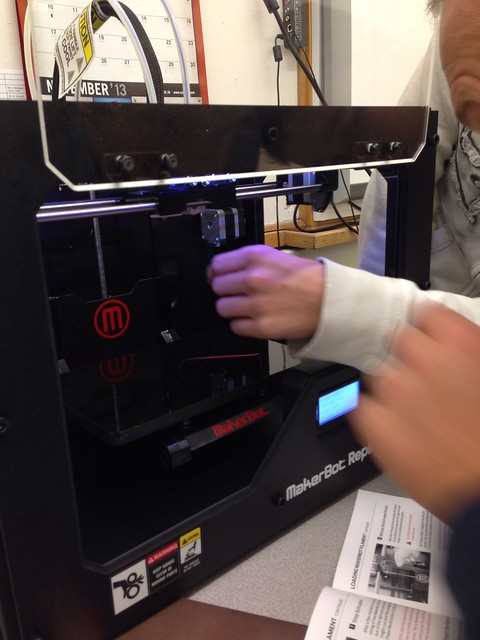
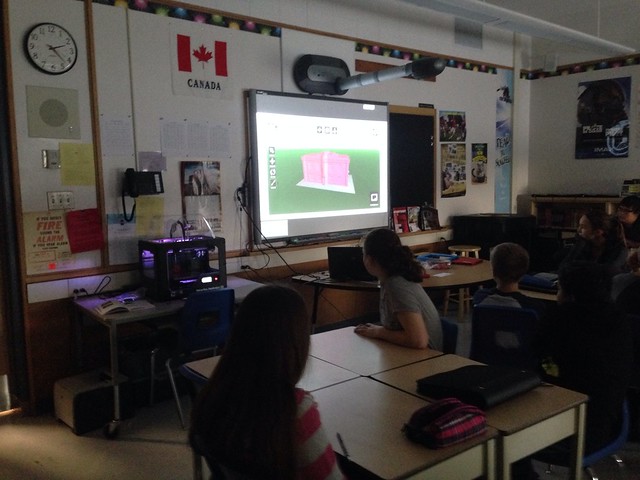
A 3D printer builds solid, three-dimensional objects out of a coil of melted filament. After students design an object using one of the various free software options, the 3D design files are translated into instructions using Makerbot desktop software and sent to the machine via USB or SD Card. Filament, which comes in various materials, runs up the back of the machine into the extruders. The filament is fed into the extruder, heated to 230 C and laid down in layers to slowly build a solid object layer by layer from the bottom up. It’s a process similar to a mig welder or a tiny hot glue gun. The display on the machine lets you know how far along the build is, in terms of time and percent of build.

In our relatively young teaching careers, we have noticed that our students come alive whenever they are presented with an opportunity to make something out of nothing. They are, as Chris Anderson quipped, “…born makers”, whether they cook, sew, or take photos.  When asked on the year-end surveys, our students tell us time and time again that their favourite activities of their grade 8 year were making gingerbread cookies at Christmas, building catapults in the wood shop and creating layered jello models of cells.

The education system of the past had students going to school for twenty-plus years to “Learn” a particular skill-set tied to one career (engineer, chef, lawyer). When their school careers were over, they went to work to “Do” – to practice what they had learned in preparation for their career.  However, the problems we now face in the 21st century and beyond, require skills and a mindset that vastly differ from before.  Our population of over billion requires us to create new food systems;  global warming is forcing us to think about how coastlines will be saved.  The world that our graduates are entering requires them to have experienced a new kind of learning, an education in which learning is married with innovation. We need graduates who know how to do more than memorize facts. They need to learn how to discover – to think beyond what has been impossible in the past. But how is this learning achieved?

Successes

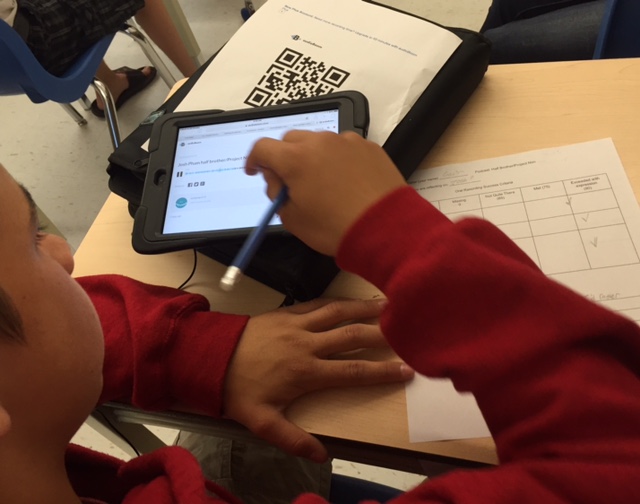
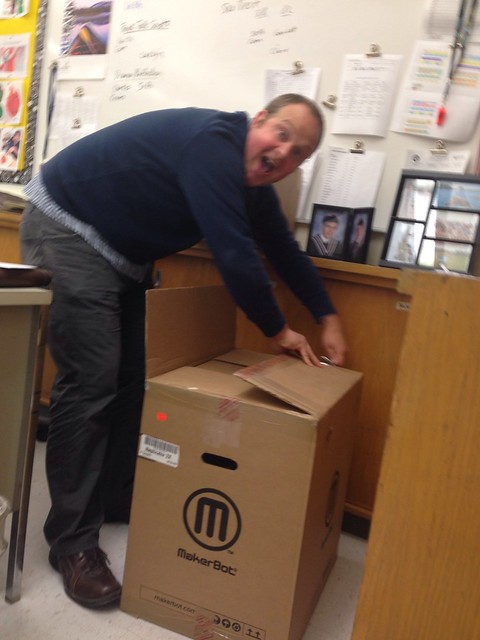
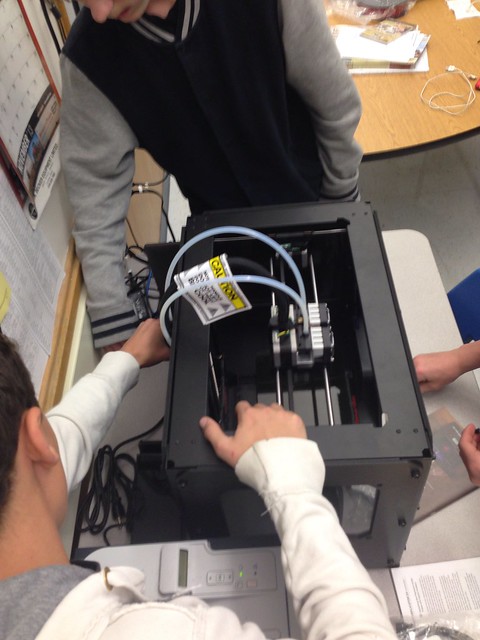
We’ve discovered, first-hand that “kids have always made things, technology has the potential to supercharge learning.” And so our foray into 3D Printing began. We began to witness successes as soon as the box was opened. First and foremost, teachers are no longer purveyors of knowledge. We knew NOTHING about how to set up a 3D printer – we plunged head first, figuratively and literally into the box and started to set it up. Three of our students took the lead from the very first day. They helped unpack the printer, found a Youtube video with setup instructions and helped us solve the plethora of technical issues we’ve had since.

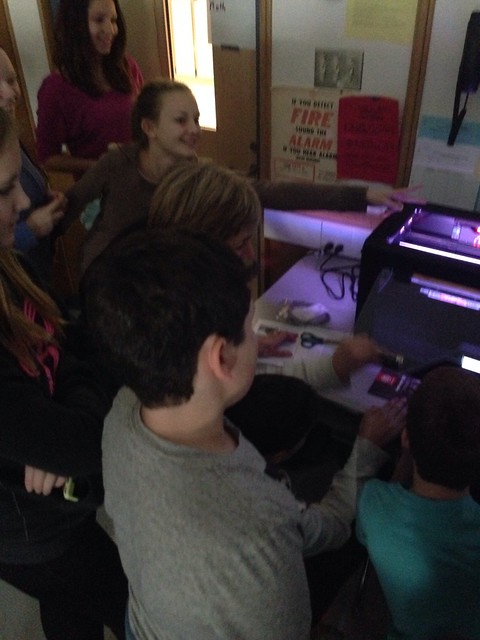
Students took the lead in sharing their new knowledge with the many others within our school and the greater district. Our policy from the beginning has been accessible for many, not a few. As a 7-12 school, there have been numerous others have utilized the printer for various projects. Within the first 7 months of having it running, over 200 students in elementary and high school grades have used the 3D printer.

A favourite education quote comes from W.B. Yeates, when he argued that, “Education is not the filling of a pail, but the lighting of a fire.” Our students know that the 3D printer is capable of printing toys such as model Minions from Despicable Me or Super Mario, or key chains.  We wanted them to understand that 3D printing technology is transforming the world – but not in 10 years – in the here and now.  We needed to ignite a fire of curiosity in our students.

To this end, the match and tinder came in the form of a presentation that challenged the students to research and present a real-world application of 3D printing to their peers.  We asked them to find an online article/video that described the “5W’s/How and Who” benefits of 3D printing technology. Our students found articles ranging from 3D printed orthotics which are a fraction of the cost of traditional orthotics, 3D printed drones being used in the military, and 3D printed columns that can withstand earthquakes.

As student and teacher learning developed, so did our fluency in new vocabulary. Words and phrases such as “filament, build plate, stl files” frequently filtered into student discussions. Students continued to suggest words that needed to be added to our growing list as they took ownership of their learning. They are very respectful of the cost associated with printing, and so they weighed and determined the price of several items based on a filament cost of $53/kg. This exercise tied in directly with their current math unit on rate and ratio. The cost to print most of their pieces ranged from 50 cents to just over $1.

The time required to print each item they design is determined not only by the size but by the resolution, or quality of the print, which can adjusted. On their own initiative, students decided to compare the quality and time of a detailed castle in high, medium and low resolution. Determining the cost and time required are important steps in the students’ introduction to 3D printing, particularly if you have a large number of students using the printer as the printer will be running throughout the day.

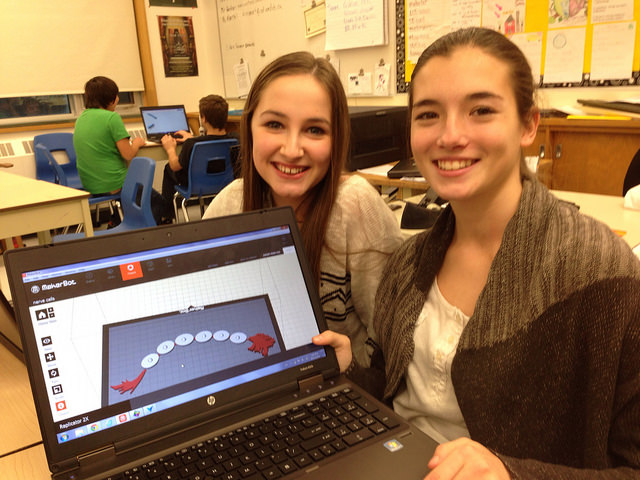
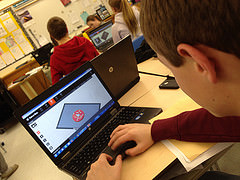
Students begin the process by designing an item using one of the various free software options before moving to the print stage. For those students who were choosing to spend their lunch hour in the classroom, we suggested they first play with  Sketchup and AutoDesk 123D Design. We had no experience with either, but had read both were good options. These students quickly picked up how to use these programs, and willingly agreed to introduce Sketchup to 60 of their peers. For us, the most exciting piece of this experience is watching who becomes the “teachers”. We often see those “C” students who fly under the radar in the regular classroom, becoming the class experts as they reveal their love of learning in this context. As with any new undertaking, students had a lot of questions. Who better to turn to than other students? Students from Donview Middle School skyped in from their wood shop class and shared their experiences with Sketchup and 123D Design.

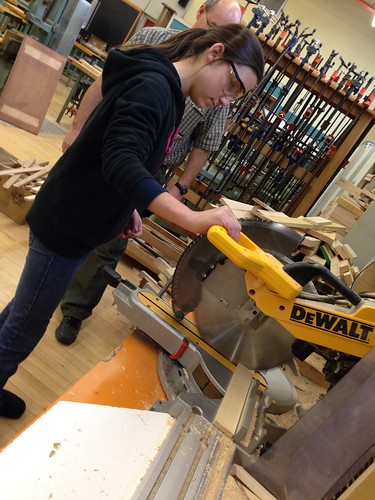
As part of our gr. 8 science unit, students had built catapults in the high school wood shop. But these catapults were all identical. Now that the students were familiar the design software, they were challenged to apply what they had learned in their Mechanical Systems unit, and improve on the design, adding a part created on the 3D printer.

No 3D Printer? No Problem..

Andrea Yantzi, a grade four/five teacher from a distant school, Sprucedale Public School, met with us in order to learn about the printer and software. Back in her classroom, Andrea introduced her students to one of the simpler software options, Tinkercad, and they applied what they had learned in their science unit on Bridges as they designed their own bridge. Andrea emailed the files to us, we printed off the students’ work, and sent their bridges, some with the student’s name on them as they had designed, back to her class. This is a similar communication process used to manufacture 3D objects on the International Space Station. You can learn more about that process on the website, Made in Space.

Thomas Pritchard, a CHSS student, took part this summer in SHAD – an engineering camp: his team developed a product called Evita to get rid of phantom power loads (a toaster, though not in use but still plugged in, is still drawing a tiny amount of power from the grid). This device will automatically disconnect that toaster from the grid and relieve phantom power loads. Through a family friend, he contacted us this past August, and came in to print his prototype on the printer. Last month, Thomas’ team won several awards at the national competition including second place out of 15 projects from across the country for the prototype, first for their applications of scientific principles, and best overall out of all the projects, tied with University of New Brunswick.

Struggles

While we hoped that the process of implementing the 3D printer in our classrooms would be stress-free, this has not been the case. Unlike computers, there are no 3D printer technicians employed by our school board. Who was going to fix it if we broke something?  With a “we can handle anything” mindset, we plunged headlong into our new reality. There have been many valleys, storms and pitfalls along the way, though we are slowly moving upwards. For example, we were shipped the wrong type of filament, and it took two painstaking weeks to problem solve the issue. Since we’re running BETA-based 3D design software (123D Design), our students are experiencing frustrating glitches and unexpected freezing mid-way through their design process. It forces students to be constantly saving their work to make sure it doesn’t get lost.

CityX Project

Our most recent activity with our grade 8 students is the City X Project which is an initiative of IDEAco (The Coalition for Innovative Development, Education and Action), a nonprofit organization. IDEAco’s mission is to build and empower communities of Changemakers around the world. City X Project introduces students to the 6 step design process, the same process the 21st world that the students will graduate into, will demand they follow.  It helps students understand a challenge and the people it affects, generate possible solutions, develop a final product, and then share with the world.

The students are assigned a real world problem in the context of a story with elements of gaming. We walked our students through the process of invention through which they learn the value of empathy, understanding the people who are facing the challenge and the larger social issue to which their assigned problem relates such as healthcare, education, or food among others. Once students have generated multiple ideas for solving the problem, they build a quick prototype based on their preferred idea. In the test phase, students share their ideas with a partner. They learn that testing reveals what works, what doesn’t work, and how a prototype can be improved. As they move onto building their final prototype, students experience the relationship between failure and the overall success of an invention. Once the final prototype has been created, students were introduced to the 3D software. This year, we decided to stay away from online programs like Tinkercad due to wifi issues we had last year when using the program, and start with Autodesk 123D Design, downloaded onto the laptops.

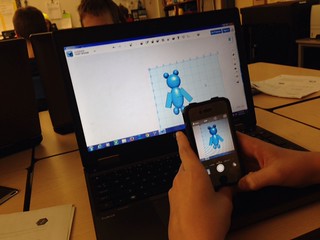
Riley and Jake, who taught the class Sketchup last year, were more than happy to be back in their old gr. 8 classroom, firing up the printer and putting together a plan for teaching over 70 students. They spent half a day with our students, teaching them the basics of 123d Design and how to create a simple object. During that time, we quickly saw their successors emerging as they grasped the program and began to help their peers. You know the student is engaged and proud of their work when they capture images of their designs. Now the students were ready to design their clay prototype on the 3D printer. On day 5, students brought their final prototype alive on the screen. Excitement built as they saw their design move from abstract to concrete as it was printed.

The final step involves students sharing their designs in the City X Project online community found at 123dapp.com/gallery or tinkercad.com/things. Use Cityx as the search query.  Many of these inventions are tagged with the global cities of the students who make them, and students will be able to learn how others around the world solved the same problem.

What Will Our Students Remember About School?

Learning about 3D printing with our students means we don’t always have the answer.  We have decided to remove ourselves from the front of the class to sitting in a desk beside our students, becoming co-learners. In doing so, we work to create an environment in which any problem is solvable. Our students tinker, make, build, test, and refine. These are skills that will assist our students solve any problem they might face in their futures. The introduction of this technology into the classroom has the opportunity to take teacher and students into never-before-dreamed of heights.

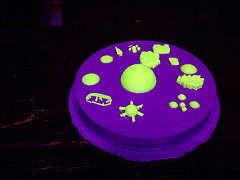
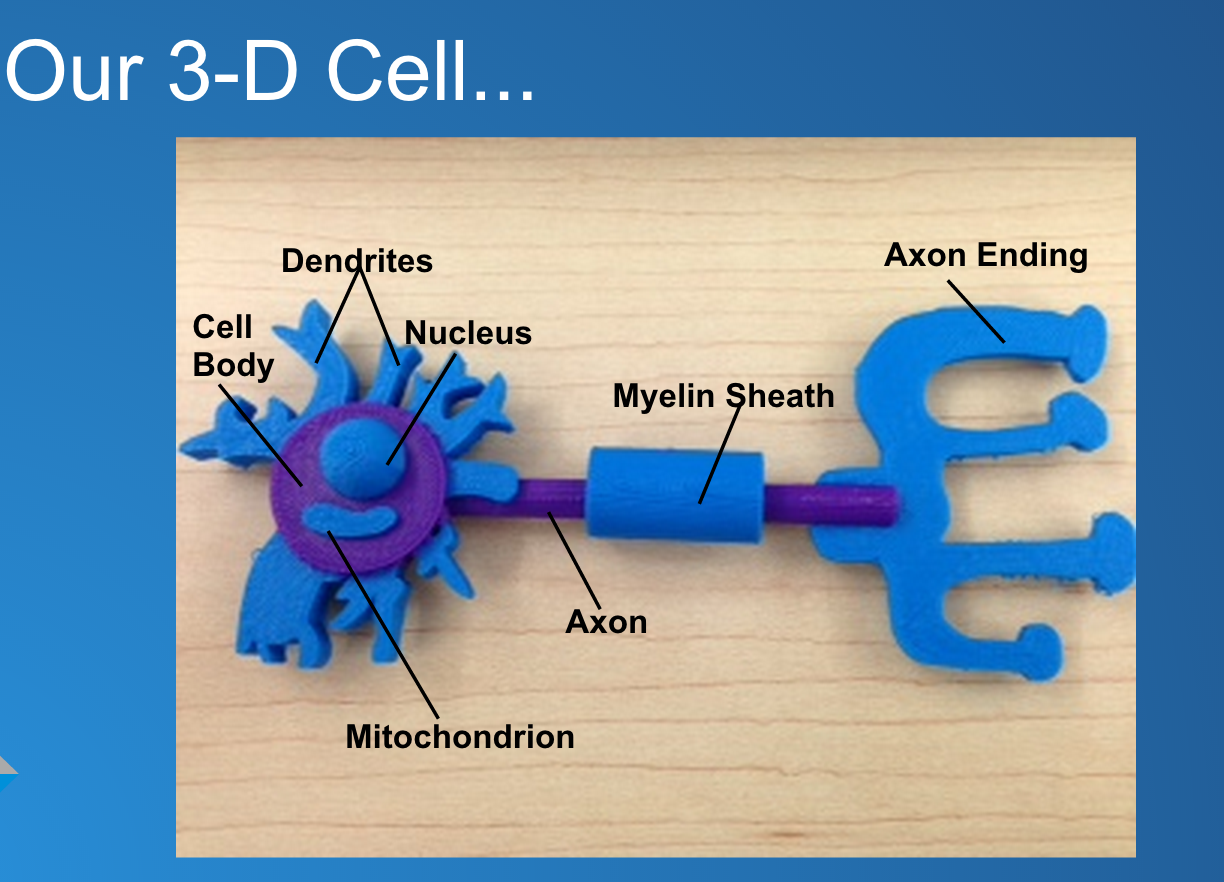
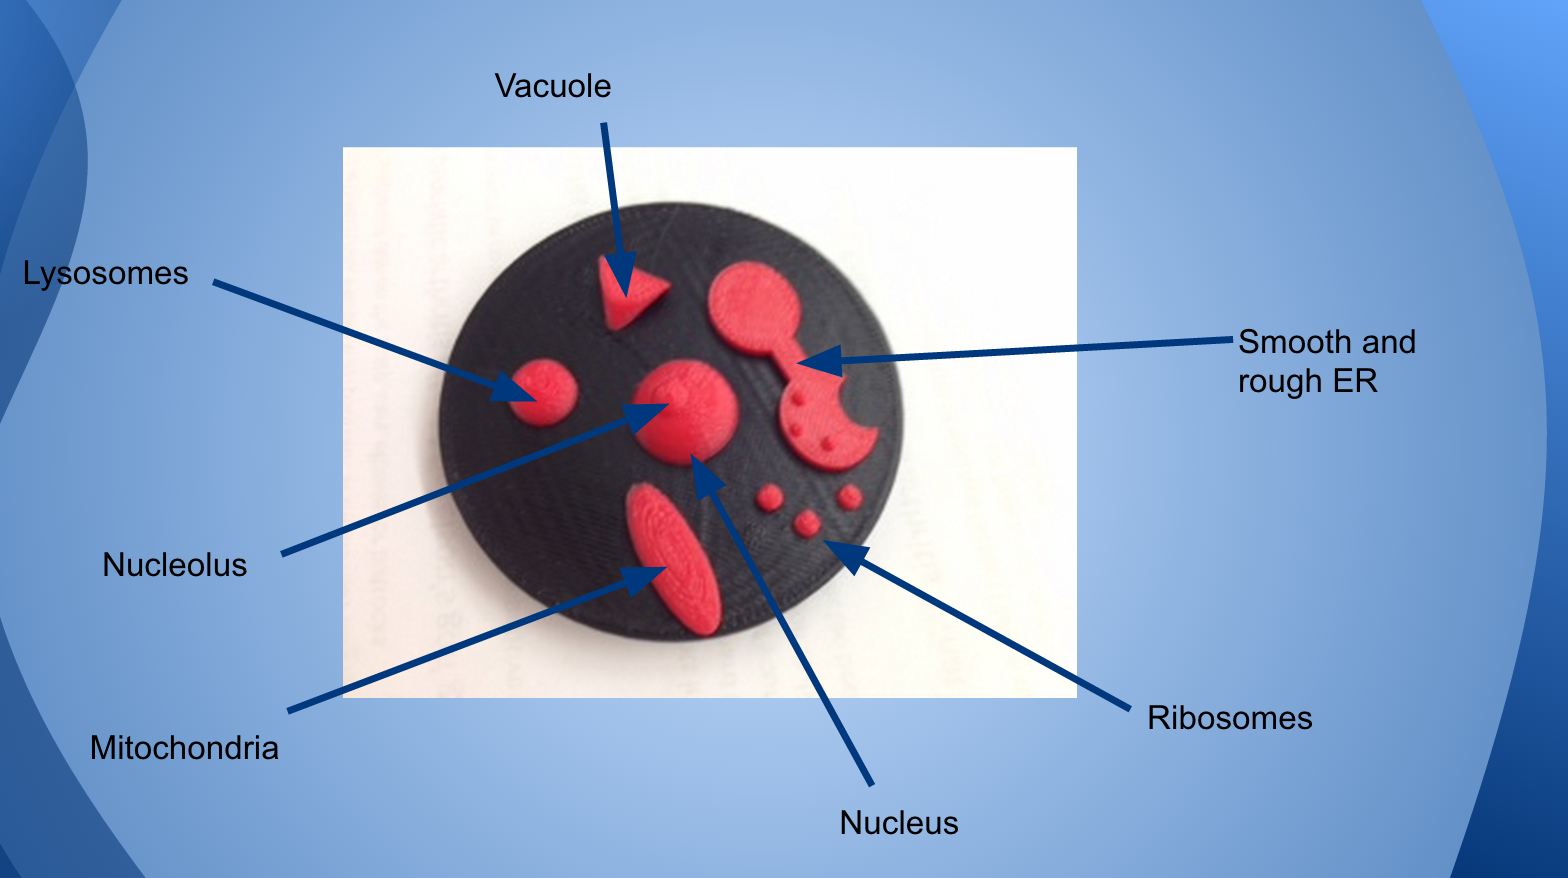
To be sure, technology should not and cannot replace tried and tested sound teaching practices. There are those who might wonder, “where is the curriculum in all of this 3D designing?”  We have gone to great lengths to ensure that our projects are tied directly to the curriculum. Our students are still reading and writing, learning about the roles and function of the organelles in cells in Science, and about settlement patterns in Geography.  However, we strongly believe that the 3D printer has the capacity to take us to a new level of thinking with our students.

Rather than rushing through the curricular demands, we have slowed down our program delivery in order to become more in line with Gary Stager, co-author of Invent to Learn, who has argued that our students simply need a supportive environment to tinker with an idea long enough to make it work. Allowing students to deeply engage with a project they are passionate about also helps produce more positive memories of school, Stager said. “The reason the Maker Movement is so exciting is it can re-energize the classroom and it can make high quality memories of education.”

It’s the getting out of the desk and getting our hands dirty that we remember from our student days. We hope that through the use of the 3D printer, we are able to offer a program that is innovative, preparing our students to solve real problems with never-before thought of innovations.

Continue reading

3D Printing Technology in the Classroom: Year 2

This week, my teaching partner, Marc Westra, and I introduced lessons to create excitement and interest around the 3D printer. Similar to last year, we wanted our gr. 8 students to see this piece of technology as being something beyond printing toys, jewellry and pizza (yes, it can do that). While these students had tinkered with the software and printer as a gr. 7 student, time had not permitted an indepth study since it was so new to us. We want our students to see what a 3D printer is capable of, and then some. How can innovators use a 3D printer to meet the diverse needs of society, to help those in need?

 Examples of innovative 3D design appear daily though the numerous feeds I subscribe to. Recently, I read an article from Computer World, “3D printed skin holds promise for burn victims and others”, featuring the work of four engineering students from Toronto who have designed a printer to create a personalized “band-aid”, created from the patient’s own skin cells. My students, one in particular who had a skin graft due to a burn as a young child, could easily come up with who would benefit from this scientific use of 3D printing and how.

University of Toronto

The PrintAlive Bioprinter 3D skin printer works by placing the victim’s grown cells along with other biomaterials into a micro-device, which then pushes them out through several channels.  The biomaterials are then mixed, causing a chemical reaction that forms a “mosaic hydrogel,” a sheet-like substance compatible with the growth of cells into living tissues. The hydrogel is rolled out in thin sheets that can create many layers of tissue.

 Students were then prompted to find their own examples, outlined in the google doc, 3D Printers: Share What you Learn. Similar to last year when we first ventured into 3D, it was fascinating to watch. While they read or viewed videos on 3D topics of their choice, our 3D printer purred in the background, creating a bracelet for an E.A. who was fascinated by the examples I had shown her. Our students were excited to share their discoveries their teachers hadn’t read or seen. Using a shared Google Presentation, students compiled their interests and shared with their classes.

 This past weekend, while my family and I began to watch CBC’s “The Nature of Things: Dreams of the Future”, I was interested to learn the first segment focused on 3D Printing Body Parts, featuring the 3D skin printer we’d discussed in class. The show touched on plastic prosthetic parts, the use of living human cells to create cartilage and bone, skin and and liver tissue. Yah – old news – my gr. 8 students already know this! And some of these segments featured the same 3D printer in our classroom.

 We are all makers, designing, creating with others to meet a need. My husband, a farmer, the epitome of the maker movement (but hates to work on the minuscule parts of our printer), thinks our 3D printer will evolve just like our farm equipment that we continually upgrade – worn out, in need of replacement. My response? “I hope so!”

On Nov. 5 and 6, Marc and I will be sharing our initial, current and next steps on how we incorporate curriculum and 3D printing in our quest to develop confidence, creativity, critical-thinking, collaboration, communication and problem solving in our students’ learning. Please chat with us at MoM on Wed. Nov. 5 and at Bring IT, Together 2014  #Bit14, Thurs. Nov. 6 in Ballroom B.

Students as Teachers: Week 2 in the Makerbot 3D Classroom

The Makerbot 2X Replicator 3D printer has brought some exciting, vigorous learning into my grade 8 classroom. My room is full at lunchtime and after school with kids experimenting and curious teachers and students observing. On a couple of occasions, I’ve even had to kick a few students out after 5 p.m. I had no prior experience with these printers. While fascinated with the articles I’d read showing how they are used in meaningful ways, I had never seen one up close until ours arrived in my classroom. In a previous post, I wrote about how students dove in, setting it up. We’ve had the printer now for eight days. In this post I’ll share what the students and I have learned together. When the tech department teachers paid a visit to our room, these 13 and 14 yr. old. “geniuses” explained how the machine worked, its maintenance requirements, cost and time of production for each model, their newly acquired vocabulary and their next steps.

Makerbot has an excellent site complete with instructional videos and an expanding page offering uses in education. Last week, when we were struggling with the Makerware download, I submitted a support ticket. The Makerbot support team was responsive and within a few days, and the software fixed, we had the program loaded onto all laptops and netbooks.

In order for students to understand what a 3D printer could produce, we spent a class period touring thingiverse. This is a design community where students can discover what others have created, and because designs are licensed under  Creative Commons, anyone can use these. The students learned how to download and print a few items from thingiverse – guitar picks, hockey stick and puck. Students are very respectful and conscious of the cost associated with printing, and so they weighed and determined the cost of each item based on a filament cost of $58/kg. The time to print each item is determined not only by the size but by the resolution, so they decided to compare the quality and time of a detailed castle in high, medium and low resolution.

Medium Resolution

High Resolution

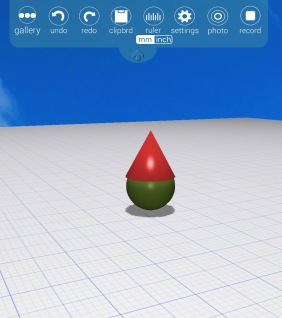
Comparing resolutions (Left t0 Right): Low, Medium, High

My next door teaching partner, Marc Westra, and I wanted students to understand that 3-D printers aren’t a fad, just used to manufacture toys. They offer benefits to society that most of us haven’t even imaged. As part of a reading activity, students explored Facebook, Twitter, Instagram and sites such as 3DPrinterworld.com to discover a multitude of uses.

This week as more students chose to spend their lunch hour in my classroom, I suggested the kids play with two design software programs, Sketchup and Auto123D (I had no experience with either). They picked up Sketchup very quickly. One student designed an army tank, then the group worked together to determine how to export the file into Makerware and print (export, save as .OBJ file). Once in Makerware, the students decided they needed to add supports for the overhanging parts of the tank which are removed after printing. All of this was happening while I was learning how to use Auto123D from Riley, another gr. 8 student.

During the next class that followed lunch, while I was teaching Language, the printer softly sang out its robotic song of beeps and bells as it churned out “Joey the Tank”.

From design to creation

Yes, there were some mistakes (yeah!) which they’ll solve and reprint. Still, the students were pretty proud of themselves after creating and printing the first original 3D model at Madill.  Skills used: collaboration, critical thinking, creativity, communication and problem solving.

Rear view showing supports

Joey the Tank

In the following class, I had these students introduce Sketchup to 60 of their peers. They’ve written an extension by creating a model for the students to produce in the next lesson. For me,  the most important piece of this experience is recognizing who these “teachers” are. A few are those “C” students who fly under the radar in the regular classroom. Now, they have moved from learner to teacher.

Student teaching students

Some students prefer Auto123D as the design software. Using the app 123D Catch, they discovered how to turn photos into a 3D models of themselves. Their goal is to create their entire class in 3D.  Other designers/entrepreneurs in class want to design and sell (as a Gr. 8 fundraiser) FE Madill “stuff” – iphone cases with the student’s name embossed, guitar picks, and more.  Their list is growing and will lead to another branch of learning including marketing and economics.

Success comes in many forms and pathways. Providing opportunities for students to explore areas of their interests strengthens our connections with them.  While there may be no direct mention of computer design structure in the Gr. 8 curriculum, the critical thinking skills they are developing as they collaborate and share is enriching their self-directed learning. It’s fascinating to experience. I’m looking forward to seeing how students and other teachers in our school use this 3D technology.

The 3-D MakerBot Arrives at F.E. Madill

This morning there were 3 big boxes in the office with my name on them. The sides were labelled with the big M…as in Makerbot. I was nervous – I wasn’t sure I could set this system up. But by the end of the day, at my students’ insistence, and with my teaching partner’s support (Marc Westra), these kids had taken over, finding the YouTube video I’d told them about that guided the process. My Gr. 8’s unpacked and put together F.E. Madill’s MakerBot 3-D Replicator 2X Printer. Some of them I expected to be involved; others surprised me. These kids are fearless; I needed that. Can’t wait to see what our students build with this machine!

The boxes arrive!


The Old and the New. Hope they get along….
The Old and the New. Hope they get along…

Supporting our Students with “Talking Text”

Over the past few years, I’ve had some of my students use the Livescribe or Echo smartpens for various oral assessment pieces. These smartpens contain a camera at the tip of the pen which read the unique pattern of dots on the special dot paper which the user of the smartpen has written on. By creating a pencast, this pattern is replayed as it tracks your handwriting.

The dot paper is regular paper which can be reproduced using a colour laserjet printer. Students using a smartpen can write as much or little as they need with the pen. The built-in microphone allows the students to record audio, adding details to their answers that might have otherwise been lost due to their struggle to write. The audio recording of their voice is added to what they write, creating a pencast. This pencast is uploaded to the computer where the teacher can see and hear the student’s thinking.

This year in my classroom, there is an increased need for accommodations during assessment, specifically reading the test to the student. While all the students had initially been trained on programs which provided text-to-voice, the students weren’t using them, finding them “glitchy, took too many steps”. Without extra support in the classroom, it’s difficult to meet the students’ needs. For this reason, I was determined to learn how to add an audio recording of me reading the test which the student could easily follow and replay as much as they needed.

Here’s how:

1. Convert text to pdf: I write my test in Google Docs, then download it as a PDF (File, download as..). Save where you can easily find it.

2. Print the test onto the dot paper: Make sure your bottom margin is large enough (1 “) so your text doesn’t overlap the record/stop buttons on the bottom of the dot paper).

3. Record your reading of the text: Use this printed test to complete your audio recording using a smartpen. I draw a circle or star beside each question as I read the test so students know where I am. You could also click stop after each question was read, then record. Regardless, students can replay as much as needed before moving on.

4. Upload pencast to Livescribe: Connect the smartpen to the computer and the recording is uploaded. The only visuals that appears on the page are the circles that I drew (see below – no printed text).

5. Convert recording to a pencast pdf: right click on the page, choose computer, choose audio pdf. Save.

6. Add the text to the pencast: Open Adobe Acrobat Pro, then find and open the just saved pencast.

7. Add the text as a watermark: Click – Document, watermark, add.  Browse – find your text pdf on your desktop. Unclick “scale to relative target page”, OK.

8. Email the file(s) to your students. They open it with Adobe Reader (version 10 or higher should be loaded on their computer (free)).

Link to the actual pencast. Download, then open in Adobe ReaderCellular Transport Quiz pg 1 final pencast pdf (1)

So what did the students think?

photo (14)

“It was easier.”  “I could just click the download, and it started.” And the surprise comment (and my favourite)..

 “I liked hearing my teacher reading to me.”   🙂